WhatsApp is currently one of the most popular instant messaging platforms to share messages and media files. If you lose your WhatsApp chat backup, you lose some extremely important information, data, and memories.
It’s important to know how to restore WhatsApp backup. However, the official methods to backup WhatsApp messages on iPhone and Android — iCloud and Google Drive — are inefficient.
The Official iCloud and Google Drive backup methods have the following problems.
You have to backup all the messages at once and then restore them all together. You can’t selective backup files or selectively restore them either. This means you end up restoring a lot of messages you had no need for.
These methods are also unsuitable for the cross-platform restoration of backups. For example, you can’t restore iOS WhatsApp backups on Android or vice versa.
In this article, we’ll discuss how to preview and selectively backup WhatsApp on iPhone and Android using a far more advanced and effective tool.
Selective WhatsApp Chat Backup on Android and iPhone
dr.fone – Restore Social App is the best tool for WhatsApp chat backup on both Android and iPhone. The best part about this tool is that you can preview and selectively backup chats and messages that you want to keep while ignoring the rest. As such, when the time comes to restore the backup, you don’t have to restore everything, but only what’s valuable.
Furthermore, dr.fone – Restore Social App also allows the cross-platform transfer of backup. That means you can restore an iOS backup on an Android phone or vice versa, making it perfect for people switching from one ecosystem to the other.
People are often hesitant about using non-official methods for restoring WhatsApp chats. However, dr.fone – Restore Social App has been developed by one of the world’s leading technological companies — Wondershare — so it’s completely reliable.
dr.fone – Restore Social App
Selective WhatsApp Chat Backup for Android and iPhone
Easily select and restore WhatsApp messages
Restore WhatsApp messages from iOS to Android and vice versa.
Transfer WhatsApp messages to computer.
Compatible with all iOS and Android devices.
How to Selectively Backup WhatsApp Chat on Android using dr.fone – Restore Social App?
Install and launch dr.fone in your computer.
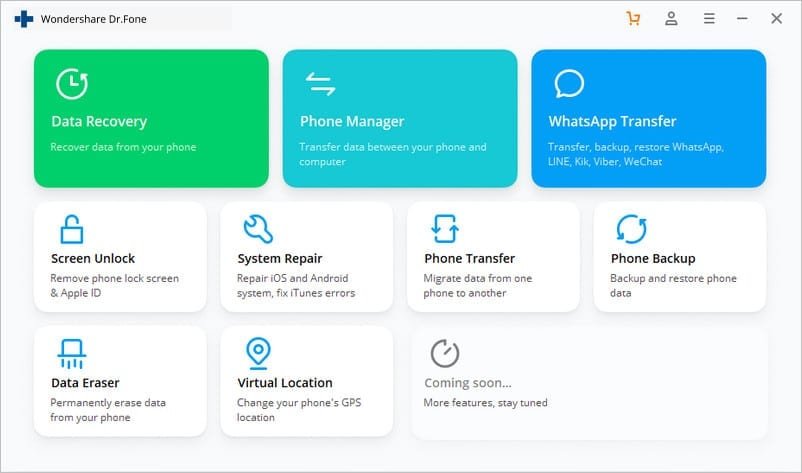
Go to the Restore Social App option.
drfone home
Connect your Android phone to the computer using a data cable. In the next window, select WhatsApp > Backup WhatsApp messages
Dr Fone WhatsApp Transfer
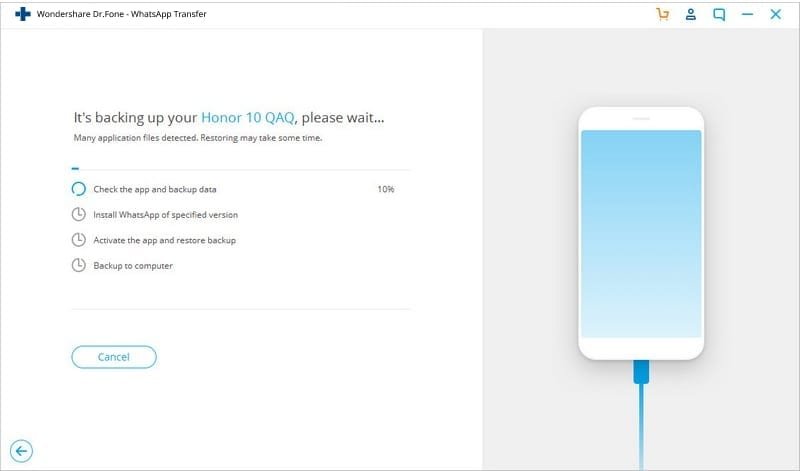
The backup will start immediately.
Dr.Fone Backing Up
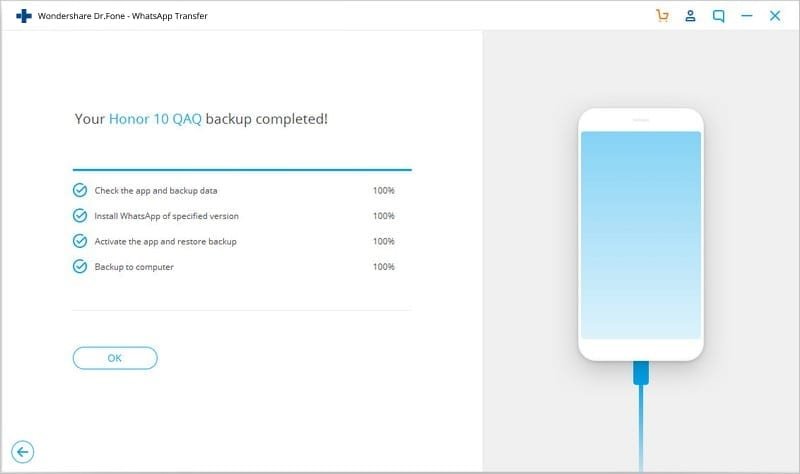
After the backup is done, you can click on View It to check the backup.
DrFone Backup complete
How to Selectively Backup WhatsApp Chat on iPhone using dr.fone – Restore Social App?
Access dr.fone and go to Restore Social App.
WonderShare Dr.Fone Manager
Connect your iPhone using a USB cord. In the next window, select WhatsApp > Backup WhatsApp messages.
Dr.Fone transfer WhatsApp Messages
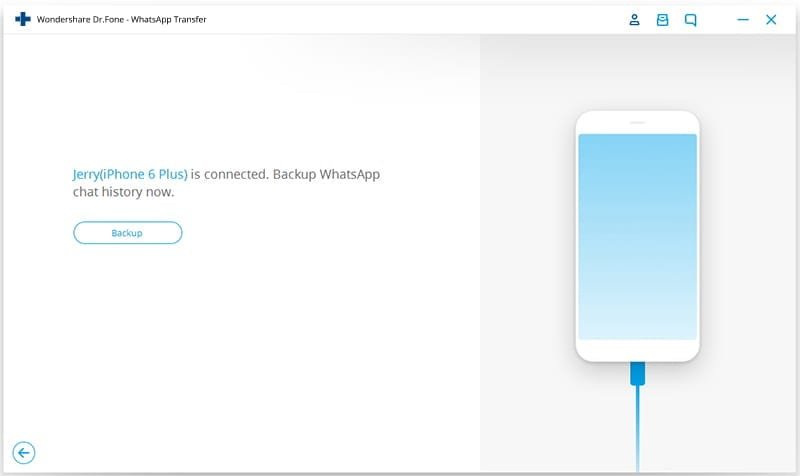
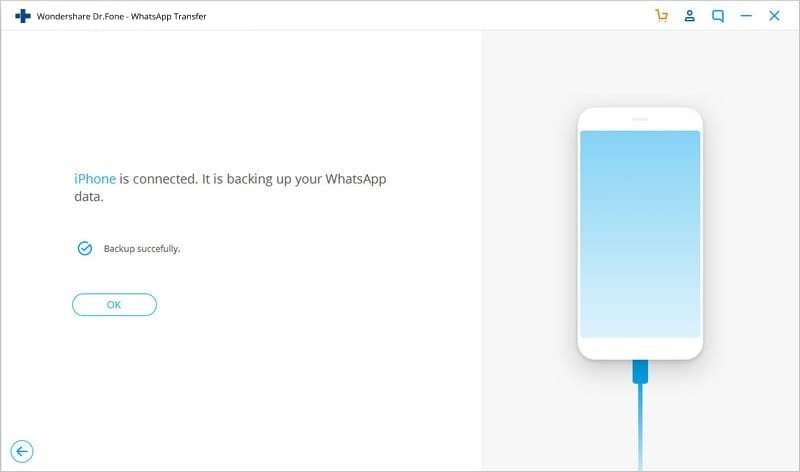
dr.fone will automatically detect your iPhone. Click on Backup to confirm.
Dr.Fone iPhone WhatsApp Backup
Once the backup is complete, you can click on View It to access the backup.
Dr.Fone Successfully Backup iPhone messages
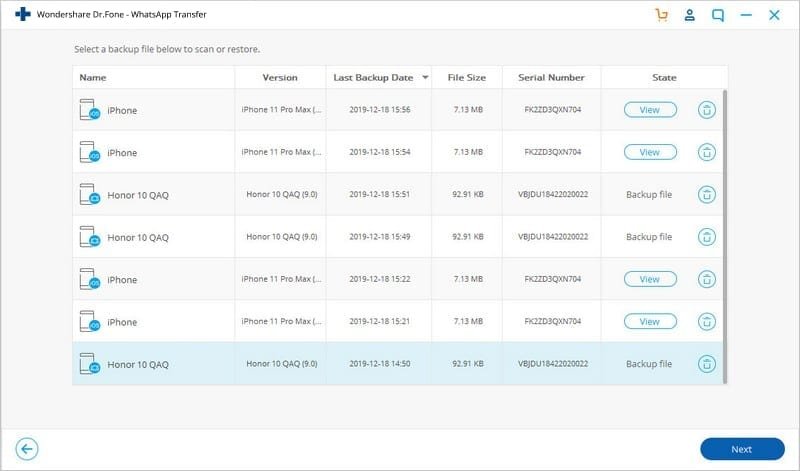
Once the backup is done, click on View It to access the recently created backup file. Go through the list of backup files and select the one you just made.
WonderShare Dr.Fone connected smartphones
You’ll be taken to a gallery. Select all the files you want to keep, and click on the Restore to Device or Export to PC options depending on what you want.
Wondershare Dr.Fone Chat transfer
With these simple steps, you’ll be able to selectively backup WhatsApp chat on iPhone or Android using dr.fone. Furthermore, after the backup has been created, you can use the same tool to restore the files in the backup into another or the same phone at a later date.
This makes dr.fone – Restore Social App the best tool for cross-platform selective WhatsApp chat backup.
Conclusion
I hope this article has helped you figure out how to preview and selectively backup WhatsApp on iPhone and Android. You no longer have to struggle with Google Drive or iCloud. You can simply use dr.fone – Restore Social App for all your backup needs.
Social media has been billed as unbeatable for its marketing potential it has also been identified as a potentially risky avenue whose use could contribute to the demise of entire brands. Its increasing popularity cannot be ignored, especially as the business takes up a more digital front.
Is social media marketing the tool to help your rand achieve growth or a potentially risky step that could permanently affect your brand? There have been so many things said about social media’s ability to help you grow your brand.
Is the platform the next big thing or just a passing fad? The prevalence and popularity of social media, coupled with an evolution towards virtual business suggests that social media marketing could be here to stay. But is it any good?
This guide will help break down the most common misconceptions about social media marketing.
Successful Social Media Marketing Is Difficult
With the right planning and execution measures, you may be able to develop a series of social media marketing efforts that could help you increase brand awareness and growth.
You need to understand your business goals and consider how social media can help you achieve them in order to stand a chance of success.
Armed with the right information about your target audience’s preference, you may be able to make your brand appealing enough to achieve your goals. Many brands have done it before, and so can you.
There Are Too Many People Outside Your Target Market
Target Market
While this is the case for social media, there are strategic paid advertisement tools that can be used to reach specific audiences.
On Facebook, for instance, you can take up remarketing strategies to advertise your brand or products to people who have already shown an interest in the past for an increased likelihood of higher conversions.
Finding your target audience involves playing to their interests. Find out what your target audience likes through polls, surveys and questionnaires, and develop your online brand profile around this.
Only the Biggest Brands Are Popular Online
There is enough love to go around on social media for brands, regardless of their size. As many as 95% of people on certain platforms follow at least one brand, which expresses a high interest in brand activity.
Brands have become so popular over time that they have surpassed celebrities, who previously racked up massive follower counts. All brands can be popular if they develop a targeting strategy and offer a range of interactive and entertaining posts.
Brands may even be popular because of the value of their customer service. On social media, size doesn’t necessarily matter.
Social Media Is Too Expensive
You cannot beat the marketing rates available through social media. Paid advertisement options are available for as low as $1, with a variety of other affordable options available on each individual platform.
You can even get instagram auto video views free to boost the performance of your content on the platform. Social media marketing is far cheaper and more efficient than traditional marketing.
It guarantees better reach, more personalized content, and additional dynamic assessment options to help evaluate the performance of marketing efforts in relation to the input.
Social media offers personal selling, which is the next step in the evolution towards a virtual business front.
My Brand Can Only Appeal to Clients Within My Area
My brand can only appeal to clients within my area
Social media offers access to a large number of people, a lot of whom may not necessarily be physically located near you.
For certain types of businesses, this may offer a limited advantage in terms of raised customer numbers. However, people in your area who may not necessarily follow you on social media could be able to monitor this interaction and gain interest in your brand, helping you to win over potential clients indirectly.
Regardless of your type of brand, social media has the right marketing strategy for your needs. You can leverage potential walk-ins by providing sufficient contact and location information. You may also consider virtualizing some aspects of your brand’s service provision for increased user satisfaction and potential for growth.
My Social Media Team Can Handle It
You need to develop well laid out strategic efforts to help your marketing and social media teamwork towards achieving your brand’s goals.
Your team should understand their expected social decorum in their posts and interactions, which limits the risk of fallout from a misjudged comment.
They should also engage a solution-oriented approach to follower complaints, which may work to improve user trust levels. Your social media team will be able to handle representing your brand on social media after comprehensive training efforts designed t help improve this regard.
Who Needs a Team Anyway?
Who needs a team anyway
You cannot handle social media activity without a dedicated unit that develops content, monitor interaction and provides to clients in a timely and professional manner.
It can be overwhelming to do this without some help. If you are considering social media activity on multiple platforms, you may completely be unable to offer these services.
So can you do it alone? If you plan to keep your operation small and minimalist on social media, you could consider setting upon one platform and detailing out your hours of operation.
If you are interested in large scale brand activity, you will need to consider a social media team for efficient operation. Just remember to provide thorough training for each brand representative.
The Free Advertising Options Are Ideal for Inexpensive Brand Growth
You will be able to advertise your brand to your followers at all times through social media. You can even schedule advertisements multiple times during the day. As long as you develop interesting advertisement content, you may be able to put out a lot of advertisements without incurring any costs.
Users will generally opt to appreciate brands that over market themselves. Your free advertising efforts could prove expensive as they may play a part in pushing followers away.
Instead of repetitive free adverts, you could consider developing and promoting high-quality content. This could win over more followers and provide an opportunity for personal selling, which could be a much more effective way to market your brand.
Umidigi has been releasing a lot of smartphones recently which includes a lot of giveaways. Their recent giveaway was the newly launched Umidigi Power which packs some nice specs.
Recently, they launched many smartphones which include Umidigi F1, Umidigi F1 Play which comes with a 48MP camera, and the Umidigi S3 Pro which also comes with a 48MP Sony Camera.
The last smartphone they launched was the Umidigi Power, which packs a massive 5150mAh battery and NFC.
The Umidigi Power was given away to 10 lucky winners and now, they have launched the giveaway of the Umidigi A5 Pro.
Umidigi A5 Pro comes with a lot of interesting features like a Triple Camera at the back and a massive battery of 4150Mah.
One of the Umidigi A5 Pro Camera features is it Ultra Wide Angle Lens and some other cool features.
As 48MP is on trend now and the main feature of the Umidigi A3 Pro is its Triple Camera, we would be expecting it to have a 48MP Camera and other Cameras.
The Umidigi A5 Pro boasts Dual SIM and a micro SD Slot, and many other excellent features.
Umidigi A5 Pro Colors
This giveaway is not restricted to any country, its an international giveaway, and anybody is qualified to participate. A total of 18 smartphones are set to be given away in this current giveaway. Do not be left out.
When designing a WordPress blog, it should be noted that the categories and tags in the blog, actually contribute to the SEO (search engine optimization) of the blog and also play a vital role, in how users would navigate on the platform.
Why WordPress categories?
WordPress categories and tags are the two most important aspects of the user experience point of view. For example, most of the related posts plugins use categories and tags to show related posts.
If your categories are not well structured, related posts will show irrelevant articles, and it will have a negative effect on the bounce rate of your WordPress blog
How To Structure WordPress Categories:
Planning the categories of your blog should be done from day one; do it as you are writing your blog’s business plan. Now let’s say you’re planning to create a blog, which would be centered on WordPress development and topics, you can structure is as below:
WordPress Themes
WordPress Plugins
WordPress SEO
WordPress News
WordPress Hacks
Editorial
This helps you (the author of the blog) to stay focused on my content strategy, and moreover, if you’re writing off-topic, this guide gives the warning to get back on track.
Now, the question arises:
Are WordPress categories good for SEO?
WordPress Categories
As I mentioned above, WordPress categories are useful for structuring your blog. From a search engine perspective, Google is much more interested in your content(posts). Moreover, category archive pages are considered a “low-quality page” as it doesn’t add any value in terms of search engine optimization.
Categories and SEO:
Usually, people think that the more pages we have in search results, the more traffic will we get.
This was true in 2011 when search engine bots were not so smart. The more indexed pages, the higher the traffic. But with the Google Panda update, search engines made it clear that they hatecontent farming– adding pages into search engines that serve no value.
NB: Pandas has to do with the manipulation of data and data frames
A category page usually contains the archive of a select category, and depending on your blog design, it may show a complete post or a post excerpt. Now, here are two questions that you should ask yourself:
Is your category page solving any problem to a user using Google Search?
If your category page is indexed, isn’t it showing the same content as your post?
In short, category pages are uselessfrom an SEO perspective but beneficial from the user experience point of view as it offers another way to navigate your site. It’s also helpful for search engine bots to crawl your website deeper.
My recommendation:
For better SEO, keep WordPress categories as “no-index“ but “do-follow”.
This will ensure that search engine bots can crawl all links, but will not index category pages. If you are planning to change your existing category names to something more sensible, make sure your permalinks are not affected by this change.
If you use permalinks like “%category% / %posts%”, I would not advise you to change your categories or use a permalinks migration plugin for your blog.
Though some SEO experts suggest that using “%category% / %posts%” or “%date% / %posts%” is a Google-friendly permalinks structure, I would rather stick with a “%post%.html” structure. The reason for this is that my posts will never get old and I can reuse them whenever I want.
I hope this post was certainly useful for you and would give you an insight on how to properly structure and create SEO optimized categories for WordPress.
Android is another platform that Google has focused upon, and its efforts are clearly visible – Android occupies more than 87.9 % market share.
With the latest Android P right around the corner, it seems like a good time to take the best of both worlds—machine learning and Android—and showcase why Android is more than likely to beat its competitors using Google’s mammoth-like intelligence prowess and why AI will attract everyday users as well as developers. Here are a few reasons why.
If you want to learn about artificial intelligence and machine learning, then I would suggest you take a machine learning course from Intellipaat.com and become an expert in it.
Google Assistant
Google announced its virtual helper back in May of 2016 during its annual conference, Google I/O. Google described it as a “conversational assistant” and hoped that it would provide “an ambient experience that extends across devices.” And the feedback received has been mostly positive.
Of course, Google isn’t alone in making an attempt at lending a software hand to its users. In fact, it isn’t even the first – Apple released a beta version of Siri with its iPhone 4S almost a decade ago, in October 2011. To say that software such as Siri has come a long way in these 7 years would be a gross understatement.
The Trend
It seems like every tech giant is releasing their own assistants every other week. While the more prominent ones are Microsoft’s Cortana, Amazon’s Alexa, Samsung’s Bixby, Google’s Assistant, and Apple’s Siri, nearly every review from professional testers reveals the one that manages to swing almost everything they throw at them. And that’s the Google Assistant.
It has proven its mettle a countless number of times in tasks ranging from speech recognition and contextual understanding to providing concise yet verbose information to any queries the user may make. Some would say it’s years ahead of other virtual assistants, and advancements like the Duplex is just confirming this.
AI-Powered Apps
Tech giants are recognizing the importance of incorporating machine learning into their products, and as our systems keep getting more powerful and people generate more data than ever, it’s no wonder why they do so. This is evident from companies adopting and promoting intelligent computations.
Apple has been urging developers to utilize its relatively new CoreML framework that can be used to train machine learning models for developing apps for iOS. It’s too early to make a judgment on this step by Apple, but it’s quite safe to say that the red fruit iPhone manufacturer is late to the party.
Google released an open-source framework called TensorFlow back in 2015 after it was tested and developed internally for more than 4 years. It has since gained the badge of industry standard and is one of the most active repositories on GitHub. It was developed with developers in mind and has multiple ports for different operating systems and supports multiple programming languages as well so a developer feels right at home.
Tensorflow Lite
Google’s aim is to have native support for its deep learning models in Android phones. Apps such as Gmail are already putting this into use by featuring something called “Smart Replies” that basically just try to understand the situation and context of an email received and will display a few options that might make for a good reply to the mentioned.
Another famous app is Photos by Google, which uses deep learning, a popular form of machine learning, to recognize people from pictures stored on the smartphone and suggest possible options such as sharing them with the person themselves or creating an entirely new album for them.
Long story short, Google has already started rolling out apps like Translate, Assistant, Photos, Gmail, etc and has made the necessary tools for developers to do the same with their own. Which brings us to the next topic –
Extremely Well Developer Support
Google has always been a loved one by developers. Besides offering great opportunities such as GSOC, it has released open-source libraries such as scikit-learn and TensorFlow that have been hugely popular and successful within the developer community.
Even Android, being open-source, offers a lot of flexibility for developers, and so, naturally, developers will be much more focused towards building scalable, optimized apps for this platform.
Google wants more and more people to enter this field of machines and has made efforts to do so. One such instance is its Machine Learning Crash Course. Machine Learning Course It’s a from-scratch course aimed at developers with almost no previous experience in the field of AI. It guides the user from basic linear algebra concepts to state-of-the-art convolutional neural networks.
Android developers were given attention with the announcement of TensorFlow Lite, which is an ecosystem for the said platform. It works smoothly with the official Android IDE, Android Studio, to develop apps with the same level of consistency as before.
Google Duplex
Google didn’t fail to make the jaws of visitors and the viewers of its developer conference for 2018 drop to the ground in pure awe. It showcased something the developers at Google had been hard at work at, named Google Duplex.
It’s an extension of the already powerful Google Assistant that helps the user get through his/her day by making appointments or bookings for services such as ordering food from a store that doesn’t have an online presence or fixing a haircut from a salon for the user.
It was presented by Sundar Pichai, leaving the audience clapping their hands away. And why wouldn’t they? They witnessed an age-old test called the Turing Test that was supposed to be almost a decade away from being solved, annihilated albeit in a very specific manner
Customer Relationship Management or simply CRM systems were designed to optimize business processes for interacting with already existing and potential customers.
For many entrepreneurs, this software still means something strange and unnecessary, but this technology definitely deserves more attention.
For sure, when it comes to communication and social interaction, people are irreplaceable by computers, machines, and software algorithms.
But CRM systems are not meant to replace employees in managing customer communications. In fact, their main goal is to improve relations with existing customers by means of lead management in CRM, to make potential customers willing to pay, and to increase the efficiency of employees.
About Leads
In most of the CRM systems “Leads” term means any individual – a person or contact, company or deal that might bring some new customers.
Most of them propose the user-friendly functionality of online lead management. Once your leads entered in CRM system you use, they are scored and qualified. This means that all the information like prospects, budget, level of interest, and company size – all are counted and calculated.
There are two types of leads – consumer leads and target leads. From the point of view of the CRM customer who wants to count the online promotion of his company, the “Lead” is a potential customer or consumer of the services proposed. The number of successfully created leads usually indicate the effectiveness of an advertising campaign on the Internet.
Reasons to Manage Leads
It is worth mentioning the functionality to integrate with the email services, which allows the user to conduct all the company correspondence within CRM and customize advanced automation scripts. For example, a program can send emails on behalf of a manager at a specified time or organize a group mailing according to the contacts database.
Software to manage sales leads allows marking every lead as prospective and non-prospective. When prospective – leads are converted to contacts. Sometimes when dealing with a company that generates a few leads at a time CRM owner might want to skip this boring process of leads creation and just pull some new names directly into the contact list instead. And this is also possible here.
Probably there are no best ways to manage leads as for different types of business different approaches are suitable. However, there are number of various CRM to manage leads.
How to Create and Manage Leads Online in NetHunt
Nethunt CRM for Gmail is one of the most prominent CRM systems created recently. It is widely considered to be the best software to manage leads online. In NetHunt all the data is stored in folders containing records.
These records inside the folders are entries, which CRM user creates when wants to add a new customer profile, new deal or contact. As CRM Software for leads management, NetHunt allows creating different fields in the folder settings. As soon as created, fields will be depicted on the record form. Moreover, after creation, they can be customized whenever needed.
There are also sections like Comments, Calendar events, and Files entry where all the CRM users can leave comments, create some events linked to the record (lead), and attach files from Google Drive or computer. NetHunt app for leads management also has a timeline for tracking record updates and all the emails linked to each record.
Important items on the record timeline can be pinned for all the users who have access to the folder could see that item first.
The CRM system as a customer relationship management tool is one of the best investments a business director can make to increase sales and increase customer loyalty. A dedicated businessman will hardly find something better for business growth promotion. As a matter of fact, such technological solutions have ceased to be the prerogative of solely large corporations.
The price of connecting the single employee to the majority of CRM users actually amounts to slightly more than most people spend on mobile communication services monthly.
Use the features on iTunes to help you export your music playlist to an Android phone. Make certain that you sort your music files according to their file format. You will need to use a third-party application to convert all of the DRM-protected music files that you purchased from the iTunes Store to MP3 format. After you have converted all of your music files to MP3 format, then you can export them to your Android phone.
Sort Your iTunes Music Playlist
Step 1:
Launch iTunes and create a playlist for the music files that you want to export to your Android phone.
Step 2:
Locate a music file and right-click your mouse button. Select “Add to Playlist” from the drop-down menu. Click the “My Playlist” button located on the left pane of the iTunes interface window.
Step 3:
Click on “View” located on the menu bar. Select “View Options” from the drop-down menu list. A pop-up box will appear on your screen. Click the checkbox next to the “Kind” option and press the “OK” button. Go to the “Kind” column on your iTunes playlist. Then sort the music files according to their file format. Next, convert any DRM-protected music files to MP3 format before exporting them to your Android phone.
Step 4:
Plug the USB cable that came with your Android phone to a USB port on your computer. Wait until Windows recognizes your Android phone and assign a drive letter to it.
Step 5:
Click on the name of a music file on your iTunes playlist. Drag and drop the music file into the “Music” folder on your phone. Unplug the USB cable from your phone, when you have finished exporting all of your music files.
Convert iTunes DRM-Protected Music Files To MP3 Format
Step 1:
Download a DRM converter application of your choice from the Internet. Soft applications such as “Best DRM Remove Software For Media Files,” “DRM Buster” and “Aimersoft M4V Converter” can be used to convert iTunes DRM-protected music files.
Step 2:
Follow the setup wizard’s instructions for installing the software application. After the installation is complete, locate the DRM converter icon on your desktop and double-click on it.
Step 3:
Use the DRM converter features to convert your DRM-protected music files to MP3 format. Click on the “Add” button located on the menu bar. Locate the file path for a DRM-protected music file on your computer.
Step 4:
Click on the music file name and load it into the DRM converter application. Click on the drop-down menu arrow located next to “Convert to” and select “MP3” from the menu.
Step 5:
Click on the “Browse” button located next to the “Output path” and save the converted music file on your computer.
No matter how fast your processor is and regardless of how much RAM you carry, there comes a time when you realize your computer just doesn’t run as fast as it did when you bought it, indicating you need to speed up your PC.
Windows loads slower, programs take longer to launch, and, in general, your computer drags like it just came off a 2-night drinking binge. If this sounds like your situation, read further.
1. Disk Cleanup Utility
You may not realize it, but just because you finish with a file doesn’t mean your computer does. In many cases, if your computer’s hard drive were a garage, you would have unused junk files piled 20 feet high and spilling out into the street.
Everyone should use the Windows “Disk Cleanup Utility” to delete old, unused, and temporary files that clog your hard drive.
Click Start, point at All Programs (or Programs), Accessories, and System Tools, and click Disk Cleanup. Analyze your hard drive for files you can eliminate, and it may shock you to see how much hard drive space (and speed) you can free up with a few clicks.
2. Defrag
Imagine a properly maintained hard drive as a room the size of Wal-Mart filled with filing cabinets. Now imagine ripping open every drawer of every filing cabinet, slinging the contents onto the floor, and trying to find one document -that’s a fragmented hard drive.
Sometimes, lack of speed simply results from your computer working too hard to find the files it needs. You can solve this problem and speed up your PC by “defragging” your hard drive.
Click Start, point to All Programs (or Programs), Accessories, System Tools, and click Disk Defragmentor. Choose the disk you want to defragment and expect to let the program run for several hours.
3. Uninstall Unused Software
We all maintain software on our systems we rarely, if ever, use. That software can steal system resources.
Click Start, Control Panel, and “Add Remove Programs” to pull up a screen that allows you to remove old programs you don’t use anymore. Simply select and uninstall all programs you know for sure you don’t need or want, and this will speed up your PC.
This operation requires a bit more technical savvy than the other four, so proceed with caution. Many programs load into the system tray in the lower right of your computer’s desktop and consume system resources even if you never use them.
Click Start, Run, type in MSConfig, and press Enter. Click the “Startup” tab to see a list of programs that automatically start with Windows. Clear the checkbox next to programs you know you don’t want to load at startup.
But don’t clear any checkbox unless you are 100% certain of a program’s purpose. Once you finish, click OK, and it will prompt you to restart Windows.
There are many ways to blocks unwanted websites on Mac OS X. The first that comes into your mind might be the Mac built-in parental controls, which is perfectly easy to be done. Likewise, there are many methods to bypass the built-in parental controls. Only making use of built-in parental controls is not far enough for your tech-savvy child. Here, I will introduce several other free ways to block unwanted content on a Mac OS X.
How to Block Websites on Firefox for Mac
There is no in-built options to bock websites in Firefox for Mac. However, Firefox does have a large selection of extensions and add-ons to block the websites that you want.
Block Websites on Firefox for Mac
Open Firefox browser, go to “Tools”―”Add-ons”.
Addon Firefox
Click “Restart now” to finalize the installation process.
Go to “My Add-ons” and click “Preferences” to load the options.
In the “Enable functions” options, check the function options that you want to enable. If you want to set a password for the BlockSite, Check “Enable authentication” and then type a password in the “New password” box.
Click “Add” and then type in a website URL. Repeat this process with all websites that you want to block in Firefox. Then click “OK” to save changes. If you set up a password, you will be prompted to enter it every time you try to change the “BlockSite” details.
How to Block Websites on Google Chrome for Mac
Chrome Nanny is an extension for Google Chrome which can be used to block websites on OS X Chrome. You can set up white-lists, black-lists and more. It provides all the flexibility that you need so as to effectively use your time online and can be also disabled or uninstalled with a click.
Right-click the “ADD TO CHROME” button, and click “Add” to install.
If you install it successfully, a small window will pop up, saying “Nanny for Google Chrome (TM) has been added to Chrome.” You can see it below.
Right-click the “Customize and control Google Chrome” button which looks like bold “三“. Go to “Tools”―”Extensions”.
Right-click “Extensions” to load the extensions page.
Check “Enabled”, then click Options. Now it will look like below:
Add the URLs and names of the websites that you want to block in the “Blocked URLs” box, and then click “Save URL”.
There are many options in Chrome Nanny. You can set it according to your own choices.
Notice: Browser like Firefox or Google Chrome has its own add-ons or extensions to block sites. However, no one works with Safari or the whole Mac system.
Mac OS X has a host file just like Windows. We can also edit Hosts via Terminal on a Mac to block specific websites that you don’t want to be accessed. Not only does it work in Safari, but also it works with the whole Mac system.
Use Terminal to Block Websites on Mac
Click the “Finder,” select “Applications,” choose the “Utilities” folder and click “Terminal.”
Type “cp /etc/hosts ~/Desktop/hosts.txt” (without the quotes) to copy your current hosts.txt file to the desktop as backup.
Type “sudo pico /etc/hosts”.
Enter your Macintosh administrator password and press “Enter.”
Use the arrow key to move the block cursor down to the bottom of the file and enter the IP address “127.0.0.1” followed by the domain name you want to block. This tells the computer that the address for that domain is now that IP number 127.0.0.1, which is your local Macintosh, and the browser won’t be able to resolve that domain to a Web page.
Press “Ctrl-X” to exit after you have entered all the domains you wish to block. The domains need to be on separate lines. You will be prompted to save. Press “Y” for Yes.
Please run the following command in Terminal to take the changes take into effect:
If you are using Mac OS 10.4.X, please type the following and press Enter:
lookup –flushcache
For Mac OS 10.5.X and later, it can be done by entering the following and press Enter:
sudo dscacheutil –flushcache
Click the Terminal menu and select Quit Terminal to exit.
Open Safari and type in the domains you blocked in the host’s file. All other browsers on your machine will be blocked from accessing that domain as well.
You can enter as many domains as you want into the hosts’ file, but put each command on a new line and remember this action blocks them from all users of the computer, including you.
We can block any sites we don’t allow to on Mac by modifying the host file. However, we do not recommend this way if you are not proficient at Mac.
Most of the ways above can only block the site one by one.
If you want to block porn content in a large scales, such as blocking sites by keywords, you may need a professional filter, like the Mac website blocker. It has more options then freeways and It is quite easy to use.
The Android OS is capable of running on various types of smartphones and portable Internet devices, such as laptops and netbook computers. To use Android as a backup operating system for your netbook computer, log on to the Internet and download the bootable file Android-x86 ISO.Use a software application such as UnetBootIn, or Win32DiskImager to help you burn a copy of the Android-x86 ISO file on a USB flash drive.
Step 1:
Launch the Web browser on your netbook computer and type “Android-x86.org” in the search text box. Click the “Search” button. Click on the “Android-x86 ISO” hyperlink and download the file on your netbook computer. After the bootable file is installed on your netbook computer, burn the file on a USB flash drive.
Step 2:
Insert the USB flash drive into an open USB port on your netbook computer. Be sure to delete and remove any files that you have saved on the USB flash drive. Also, make certain that the device has 256MB or more of free space available on it. Transfer all of the files that you want to keep to your hard drive. Or, use another USB flash drive to copy all of your files to the device.
Step 3:
Run “UnetBootIn” or “Win32DiskImager” and burn the “Android-x86 ISO” file on a USB flash drive. Follow the software’s instructions on how to write bootable images to an external storage device. If you decide to use UnetBootIn, click on the bullet next to “Diskimage.” Then click on the “…” button and select “Android-x86 ISO.” Go to “Menu” located near the bottom of the screen and select the name of the USB flash drive. Click on the “OK” button. It may take a few minutes for the application to finish copying the “Android-x86 ISO” file to the USB flash drive.
Step 4:
Reboot your netbook computer. Press the “F2” key on your keyboard before the Windows startup screen appears to enter the BIOS (Basic Input Output System). Follow the BIOS instructions near the bottom of the screen and select the appropriate keys that will help you to navigate through the BIOS screens.
Step 5:
Change the boot priority order in your BIOS. Select the sequence option that will enable your netbook computer to boot first from the USB flash drive. Press the “ESC” or “F10” key to save your BIOS settings and exit.
Step 6:
Wait for the installation process to start. Select a partition to install Android OS on your netbook’s hard drive. Format the partition using the EXT3 format. Then install the GRUB boot loader. Reboot your netbook computer to enable the Android OS to compile. If you do not want to install the application on your netbook’s hard drive, select the option that will enable Android OS to run from the USB flash drive.
Smartphones and digital cameras of all sorts enable us to preserve our fondest memories or create videos that promote the products or services we would like to offer to the world by pushing a single button.
However, the raw footage we capture with our cameras is not always presentable, as it can contain parts we don’t want others to see. Editing the footage you record may help you produce videos that tell compelling stories and amass a lot of views, likes, and comments.
That’s why in this article we are going to take you through some of the best video makers you can use for free to create captivating video content in 2020.
Top 5 Best Free Video Makers in 2020
Cutting or trimming the footage, adding transitions between two video clips or making a soundtrack for a video are among the things you can do to make your videos more interesting.
All video makers, we featured in this article offer the tools that will allow you to perform these video editing tasks with ease and much more. So, let’s take a look at some of the best free video makers in 2020.
Compatibility: macOS If you have a Mac computer and you don’t want to spend money on video editing software products, then you can edit your videos with the iMovie app that comes bundled with the version of the macOS that is installed on your computer.
iMovie offers 8 different themes and 14 trailer templates you can use to create social media videos effortlessly.
What’s more, each of the themes also contains ten video filters, as well as the split-screen, picture-in-picture, slow motion, and fast forward effects.
iMovie’s music library has a rich selection of royalty-free songs and sound effects you can use to create perfect soundtracks for all videos you edit with this video maker.
Both the newcomers to the world of video editing and relatively experienced video editing professionals can use Filmora9 equally effectively to create amazing short and long-form videos.
Wondershare’s video maker supports nearly all commonly used photo and video file formats so you can use it to edit 4K videos captured with GoPro cameras or videos you’ve recorded with your Smartphone.
You can add up to a hundred audio and video tracks to the Filmora9’s timeline, which makes creating a picture-in-picture effect or adding text overlays ridiculously easy. The best part is that you can export all your videos to your YouTube channel directly from Filmora9.
Compared to iMovie, you can get more video effects, titles, filters, transitions, and elements from Filmora9. You can do some basic video editing as well as advanced editings such as stabilize videos and fix shaky videos, compositing chroma key video, and quick color grading.
You can use Filmora9 on both Windows PC and Mac computer, what’s more, you can now edit Windows project files on Mac or vice versa.
Besides the built-in music tracks and sound effects in the Audio library, you can also find more in the newly released stock media You will enjoy making videos with Filmora9 since it is so fun to create videos with Filmora.
FlexClip
Compatibility: Linux, Windows, Mac (online)
FlexClip is an online video editor that simplifies the process of creating and editing videos. It is trying to be a comprehensive solution that caters to various professional and personal uses. So if you are looking for a tool to produce social media videos, slideshows, family videos, or anything in between, then this might be the right choice for you.
It is designed to be easy to use for creating professional videos. No advanced knowledge of video editing is needed. It is effortless to use and in a few minutes, you will be able to obtain a high-quality video.
You can quickly trim a video and make it much more dynamic by combining text animation and audio recordings. FlexClip’s powerful editing tools also give you complete control over the look of your video, background music, and more.
Besides, FlexClip comes with a lot of templates so that everyone can quickly make short videos. What’s more, there are many fashionable materials that can be used for promotional videos such as stocked videos and photos.
Compatibility: Linux, Windows, Mac This cross-platform video maker is stacked with powerful editing tools that grant you complete control over the video editing process.
Besides basic video editing options like cutting or rotating videos, OpenShot also offers compositing and color correction features aimed at skilled video editing professionals. What’s more, if you opt for this video maker, you will gain access to a huge selection of visual effects that can make the colors in your videos more vibrant.
OpenShot doesn’t have a music library, so before you start working on a project you must first prepare all the music and sound effects you would like to use in the final cut of the video.
This award-winning app for iPhone and iPad devices are designed to make the video editing process fun and simple. You can trim videos with a single tap, change a video’s orientation or try out different filters in order to find a perfect visual style for your video.
Splice lets you import photos to all projects, which means that you can create videos made entirely out of photos. The app has a built-in voice recorder you can use to record narration or sound effects for your videos. Splice also features a huge music library that contains songs and effects you can use in all of your projects for free.
If you were looking for a video maker that you can use on your iPhone or your Android phone, then you shouldn’t look any further.
FilmoraGo lets you make videos in just three simple steps, as you just have to select the videos and photos stored in your phone’s gallery or on your social media accounts, choose a theme, and hit the share button.
Cropping and rotating photos and videos, adding text overlays or titles, or applying filters are just a few reasons why FilmoraGo is one of the best free video editing apps you can find on the market.
Conclusion
Polishing the videos you’ve recorded with a Smartphone or a digital camera can only make them more popular on social media. Hopefully, this article is going to help you discover a video maker that offers all the video editing tools you need to create videos that are going to get a lot of attention on social media.
Which video maker are you planning on using in 2020 to create videos? Leave a comment and let us know.
There are several ways to write a standard business plan, but you know nowadays many people just curate something and then fix a little stuff up and down to make up a plan which would certainly backfire at the end of the day, this article here is centered on how to write a standard business plan.
This article was curated from Bplans written by Samuel Jim
Keep it short
Business plans should be short and concise.
The reasoning for that is twofold:
First, you want your business plan to be read (and no one is going to read a 100-page or even 40-page business plan).
Second, your business plan should be a tool you use to run and grow your business, something you continue to use and refine over time. An excessively long business plan is a huge hassle to revise—you’re almost guaranteed that your plan will be relegated to a desk drawer, never to be seen again.
Know your audience
Write your plan using language that your audience will understand. For example, if your company is developing a complex scientific process, but your prospective investors aren’t scientists, avoid jargon, or acronyms that won’t be familiar.
Instead of this: “Our patent-pending technology is a one-connection add-on to existing bCPAP setups. When attached to a bCPAP setup, our product provides non-invasive dual pressure ventilation.”
Write this: “Our patent-pending product is a no power, easy-to-use device that replaces traditional ventilator machines used in hospitals at 1/100th the cost.”
Accommodate your investors, and keep explanations of your product simple and direct, using terms that everyone can understand. You can always use the appendix of your plan to provide the full specs if needed.
Don’t be intimidated
The vast majority of business owners and entrepreneurs aren’t business experts. Just like you, they’re learning as they go and don’t have degrees in business.
Writing a business plan may seem like a big hurdle, but it doesn’t have to be. You know your business—you’re the expert on it. For that reason alone, writing a business plan and then leveraging your plan for growth won’t be nearly as challenging as you think.
And you don’t have to start with the full, detailed business plan that I’m going to describe here. In fact, it can be much easier to start with a simple, one-page business plan—what we call a Lean Plan—and then come back and build a slightly longer, more detailed business plan later.
6 elements to include in a business plan
Now that we have the rules of writing a business plan out of the way, let’s dive into the elements that you’ll include in it.
The rest of this article will delve into the specifics of what you should include in your business plan, what you should skip, the critical financial projections, and links to additional resources that can help jump-start your plan.
Remember, your business plan is a tool to help you build a better business, not just a homework assignment.
Here are the basic components of the business plan you’re going to write.
Executive summary
This is an overview of your business and your plans. It comes first in your plan and is ideally only one to two pages. Most people write it last, though.
Opportunity
This section answers these questions: What are you actually selling and how are you solving a problem (or “need”) for your market? Who are your target market and competition?
Execution
How are you going to take your opportunity and turn it into a business? This section will cover your marketing and sales plan, operations, and your milestones and metrics for success.
Company and management summary
Investors look for great teams in addition to great ideas. Use this chapter to describe your current team and who you need to hire. You will also provide a quick overview of your legal structure, location, and history if you’re already up and running.
Financial plan
Your business plan isn’t complete without a financial forecast. We’ll tell you what to include in your financial plan.
Appendix
If you need more space for product images or additional information, use the appendix for those details. Let’s dive into the details of each section of your business plan and focus on building one that your investors and lenders will want to read.
Executive summary
The executive summary of your business plan introduces your company, explains what you do, and lays out what you’re looking for from your readers.
Structurally, it is the first chapter of your business plan. And while it’s the first thing that people will read, I generally advise that you write it last.
Why? Because once you know the details of your business inside and out, you will be better prepared to write your executive summary. After all, this section is a summary of everything else you’re going to write about.
Ideally, the executive summary can act as a stand-alone document that covers the highlights of your detailed plan. In fact, it’s very common for investors to ask for only the executive summary when they are evaluating your business. If they like what they see in the executive summary, they’ll often follow up with a request for a complete plan, a pitch presentation, and more in-depth financials.
Because your executive summary is such a critical component of your business plan, you’ll want to make sure that it’s as clear and concise as possible. Cover the key highlights of your business, but don’t into too much detail. Ideally, your executive summary will be one to two pages at most, designed to be a quick read that sparks interest and makes your investors feel eager to hear more.
The critical components of a winning executive summary:
One sentence business overview
At the top of the page, right under your business name, include a one-sentence overview of your business that sums up the essence of what you are doing.
This can be a tagline but is often more effective if the sentence describes what your company actually does. This is also known as your value proposition.
Problem
In one or two sentences, summarize the problem you are solving in the market. Every business is solving a problem for its customers and filling a need in the market.
Solution
This is your product or service. How are you addressing the problem you have identified in the market?
Target market
Who is your target market, or your ideal customer? How many of them are there? It’s important here to be specific.
If you’re a shoe company, you aren’t targeting “everyone” just because everyone has feet. You’re most likely targeting a specific market segment such as “style-conscious men” or “runners.” This will make it much easier for you to target your marketing and sales efforts and attract the kinds of customers that are most likely to buy from you.
Competition
How is your target market solving their problem today? Are there alternatives or substitutes in the market? Every business has some form of competition and it’s critical to provide an overview in your executive summary.
Company overview and team
Provide a brief overview of your team and a short explanation of why you and your team are the right people to take your idea to market.
Investors put an enormous amount of weight on the team—even more than on the idea—because even a great idea needs great execution in order to become a reality.
Financial summary
Highlight the key aspects of your financial plan, ideally with a chart that shows your planned sales, expenses, and profitability. If your business model (i.e., how you make money) needs additional explanation, this is where you would do it.
Funding requirements
If you are writing a business plan to get a bank loan or because you’re asking angel investors or venture capitalists for funding, you must include the details of what you need in the executive summary.
Don’t bother to include terms of a potential investment, as that will always be negotiated later. Instead, just include a short statement indicating how much money you need to raise.
Milestones and traction
The last key element of an executive summary that investors will want to see is the progress that you’ve made so far and future milestones that you intend to hit. If you can show that your potential customers are already interested in—or perhaps already buying—your product or service, this is great to highlight.
You can skip the executive summary (or greatly reduce it in scope) if you are writing an internal business plan that’s purely a strategic guide for your company. In that case, you can dispense with details about the management team, funding requirements, and traction, and instead treat the executive summary as an overview of the strategic direction of the company, to ensure that all team members are on the same page.
opportunity
Opportunity
There are four main chapters in a business plan—opportunity, execution, company overview, and financial plan. The opportunity chapter of your business plan is where the real meat of your plan lives—it includes information about the problem that you’re solving, your solution, who you plan to sell to, and how your product or service fits into the existing competitive landscape.
You’ll also use this section of your business plan to demonstrate what sets your solution apart from others, and how you plan to expand your offerings in the future.
People who read your business plan will already know a little bit about your business because they read your executive summary. But this chapter is still hugely important because it’s where you expand on your initial overview, providing more details and answering additional questions that you won’t cover in the executive summary.
The problem and solution
Start the opportunity chapter by describing the problem that you are solving for your customers. What is the primary pain point for them? How are they solving their problems today? Maybe the existing solutions to your customer’s problem are very expensive or cumbersome. For a business with a physical location, perhaps there aren’t any existing solutions within reasonable driving distance.
Defining the problem you are solving for your customers is far and away the most critical element of your business plan and crucial for your business success. If you can’t pinpoint a problem that your potential customers have, then you might not have a viable business concept.
To ensure that you are solving a real problem for your potential customers, a great step in the business planning process is to get away from your computer and actually go out and talk to potential customers. Validate that they have the problem you assume they have, and then take the next step and pitch your potential solution to their problem. Is it a good fit for them?
Once you have described your target market’s problem, the next section of your business plan should describe your solution. Your solution is the product or service that you plan on offering to your customers. What is it and how is it offered? How exactly does it solve the problem that your customers have?
For some products and services, you might want to describe use cases or tell a story about a real user who will benefit from (and be willing to pay for) your solution.
Target market
Now that you have detailed your problem and solution in your business plan, it’s time to turn your focus toward your target market: Who are you selling to?
Depending on the type of business you are starting and the type of plan you are writing, you may not need to go into too much detail here. No matter what, you need to know who your customer is and have a rough estimate of how many of them there are. If there aren’t enough customers for your product or service, that could be a warning sign.
Market analysis and market research
If you are going to do a market analysis, start with some research. First, identify your market segments and determine how big each segment is. A market segment is a group of people (or other businesses) that you could potentially sell to.
Don’t fall into the trap, though, of defining the market as “everyone.” The classic example is a shoe company. While it would be tempting for a shoe company to say that their target market is everyone who has feet, realistically they need to target a specific segment of the market in order to be successful. Perhaps they need to target athletes or business people who need formal shoes for work, or perhaps they are targeting children and their families. Learn more about target marketing in this article.
TAM, SAM, and SOM
A good business plan will identify the target market segments and then provide some data to indicate how fast each segment is growing. When identifying target markets, a classic method is to use the TAM, SAM, and SOM breakdown to look at market sizes from a top-down approach as well as a bottom-up approach. Here are some quick definitions:
TAM: Your Total Available or Addressable Market (everyone you wish to reach with your product)
SAM: Your Segmented Addressable Market or Served Available Market (the portion of TAM you will target)
SOM: Your Share Of the Market (the subset of your SAM that you will realistically reach—particularly in the first few years of your business)
Once you have identified your key market segments, you should discuss the trends for these markets. Are they growing or shrinking? Talk about the market’s evolving needs, tastes, or other upcoming changes to the market.
Your ideal customer
When you have your target market segments defined, it’s time to define your ideal customer for each segment. One way to talk about your ideal customer in your plan is to use your “buyer persona” or “user persona.” A buyer persona is a fictitious representation of your market—they get a name, gender, income level, likes, dislikes, and so on.
While this may seem like additional work on top of the market segmentation that you have already done, having a solid buyer persona will be an extremely useful tool to help you identify the marketing and sales tactics you’ll need to use to attract these ideal customers.
Key customers
The final section of your target market chapter should discuss key customers. This section is really only required for enterprise (large) companies that have very few customers. Most small businesses and typical startups can skip this and move on.
But if you selling to other businesses (B2B), you may have a few key customers that are critical to the success of your business, or a handful of important customers that are trend leaders in your space. If so, use this final portion of your target market chapter to provide details about those customers and how they are important to your business’s success.
Competition
Immediately following your target market section, you should describe your competition. Who else is providing solutions to try and solve your customers’ pain points? What are your competitive advantages over the competition? Most business plans use a “competitor matrix” to easily compare their features against their competition.
The most important thing to illustrate in this section of your business plan is how your solution is different or better than other offerings that a potential customer might consider. Investors will want to know what advantages you have over the competition and how you plan on differentiating yourself. One of the biggest mistakes entrepreneurs make in their business plans is stating that they don’t have any competition.
The simple fact is that all businesses have competition. Competitors may not always come in the form of “direct competition,” which is when you have a competitor offering a similar solution to your offering. Often times, you may be dealing with “indirect competition,” which is when consumers solve their problem with an entirely different kind of solution.
For example, when Henry Ford was first marketing his cars, there was very little direct competition from other car manufacturers—there weren’t any other cars. Instead, Ford was competing against other modes of transportation—horses, bikes, trains, and walking. On the surface, none of these things look like real direct competition, but they were how people were to solving their transportation problems at that time.
Future products and services
All entrepreneurs have a vision of where they want to take the business in the future if they are successful. While it’s tempting to spend a lot of time exploring future opportunities for new products and services, you shouldn’t expand too much on these ideas in your business plan.
It’s certainly useful to include a paragraph or two about potential future plans, to show investors where you are headed in the long term, but you don’t want your plan to be dominated by long-range plans that may or may not come to fruition. The focus should be on bringing your first products and services to the market.
execution
Execution
Now that you’ve completed the opportunity chapter, you’re going to move on to the execution chapter, which includes everything about how you’re actually going to make your business work. You’ll cover your marketing and sales plans, operations, how you’ll measure success, and the key milestones that you expect to achieve.
Marketing and sales plan
The marketing and sales plan section of your business plan details how you plan to reach your target market segments (also called target marketing), how you plan on selling to those target markets, what your pricing plan is, and what types of activities and partnerships you need to make your business a success. Before you even think about writing your marketing plan, you must have your target market well-defined and have your buyer persona(s) fleshed out. Without truly understanding who you are marketing to, a marketing plan will have little value.