You can sign a PDF without printing, scanning, or hunting for a working pen.
Pick by stakes. A school permission form needs a legible mark in the right box. A three-party services contract needs a record of who signed and when, plus an unaltered file afterward. Those jobs call for different tools, and mixing them up is where many signing mistakes begin.
One correction up front: a signature image on a page proves very little by itself. Origin checks and integrity checks can come from a cryptographic digital signature applied by the workflow. Whether your file carries that layer depends entirely on the tool you picked.
Quick Take
- Single signer, one-off document, no platform named by the recipient: use local markup in your PDF viewer if it offers a signing tool, then export the finished file.
- Several signers, sender-side tracking, or evidence you may need months from now: use a dedicated e-signature workflow with field assignment and a completion record.
- A recipient who specifically requires an EU qualified signature: that is an eIDAS trust-service category, and only a qualified provider supplies it.
What “signing a PDF” actually means
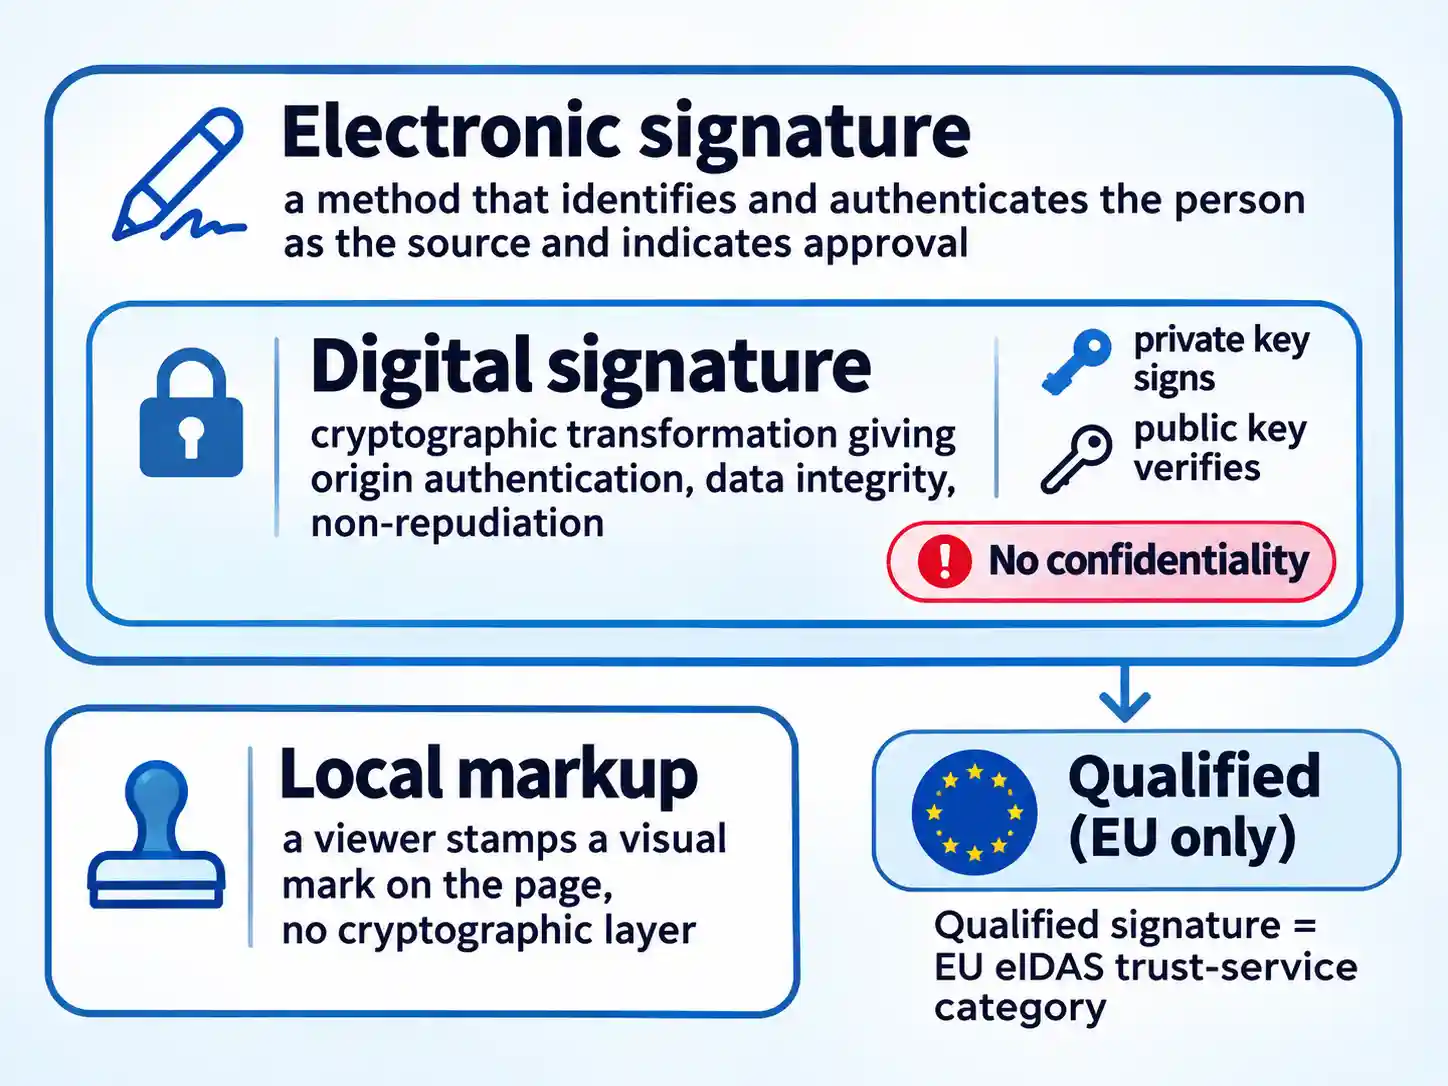
An electronic signature is the broad category. The NIST glossary defines it as a method of signing an electronic message that identifies and authenticates a particular person as the source and indicates that person’s approval of the content. That single definition covers a finger-drawn mark on a tablet, a typed name, and a click-to-accept button in a web form.
A digital signature is the narrow, technical case. NIST describes it as the result of a cryptographic transformation of data that, when properly implemented, supports origin authentication, data integrity, and signatory non-repudiation. The private key signs; the public key verifies. Note what the mechanism leaves out: confidentiality. Encrypting the file is a separate job.
Local markup sits beside both as a workflow. Your PDF viewer stamps a visual mark onto the page. On macOS, Preview’s Markup toolbar carries a Sign tool: click a saved signature, drag it into position, resize with the blue handles, then save or export. Form fields in the same document get filled with the Form Fill tool. That is a workable way to sign a form. The mark is a visual layer, and the file’s provenance depends on how you deliver it afterward.
Inside the EU, eIDAS adds a regulatory layer on top of these technical categories. The regulation establishes a framework for digital identity and trust services, and qualified trust services must meet legal requirements and are recognised across member states. Electronic registered delivery services provide evidence of the time of sending, receipt, and content integrity, while electronic time stamping supports archiving and data integrity. A qualified electronic signature is one specific category inside that framework, so treat a generic “secure online signature” badge from a random tool as a marketing phrase until the provider’s documentation shows what it actually does.
Sign a PDF without printing, step by step
The sequence below follows a browser-based signing service from upload to a saved copy. Menu names vary by provider and release; match each step to the function rather than the label.
- Save a clean copy and note the recipient’s requirements.Duplicate the original file and name the working copy with the document type, the counterparty, and a date, so a second version is never mistaken for the first.Before you touch the page, confirm whether the recipient named a platform, wants a completion record attached, or will accept a flattened PDF. Those three answers decide which route you take.You should end this step with an untouched original and one working copy that carries the current date.
- Upload the PDF to the signing service you chose.Use the service the sender named, or a provider you already use. Open it through a URL you typed or a bookmark, not an emailed link you did not request, which is a standard phishing pattern.Sign in before you upload a private file. If the sender sent an invitation through a platform, open that invitation and review the document inside the sender’s workspace instead of downloading and re-uploading it.The document should render completely, with every page visible and any assigned fields highlighted before you type anything.
- Check the document and the assigned fields.Confirm the sender, document name, and page count before you fill anything. A misnamed file or a missing page is easier to catch now than after signing.If the sender assigned fields, click each highlighted box in turn. If the service lets you place your own signature, date, and text boxes, put them only where the document calls for them. Labels differ by provider, so look for the field type rather than a particular menu name.The page should show every field you must complete, and no field should sit on top of a clause or outside its intended box.
- Fill the text fields before you sign.Type names, addresses, and dates into the real form fields where they exist. Text that lives in a field stays aligned and searchable.Floating a text box over a page works as a fallback, yet it can drift across a line or cover a clause when the file is rendered elsewhere.Scroll the full page once: no text should overrun its box, and no clause should be hidden behind an annotation.
- Place the signature, the initials, and the date.Choose a saved signature or create one by drawing, typing, or uploading an image where the service offers those choices. Drag it onto the signature line, then resize it so it sits within the ruling. Initials go in the margin boxes, the date goes in the date field.Oversized marks can cause a rejected file. When in doubt, make the signature slightly smaller than the line allows.At a comfortable zoom level, the mark should rest on the line and stay legible without overlapping printed text.
- Review every page at readable zoom.Page through the entire document, including the pages you did not touch. Check the page count against the original.A dropped annotation, a duplicated page, or a page that reflows after field insertion all show up at this stage and not later.Recipient-ready means the file reads cleanly from page one to the end, with nothing left half completed.
- Complete the signing and save the finished PDF.Use the service’s Finish, Complete, or Done control once you have checked every field. Then save or download the final PDF and any completion record, certificate, or audit log the service supplies.Where the service supplies a completion record, keep it beside the PDF so the pair travels together. If it does not supply one, do not assume the file carries a verifiable signing history.The confirmation screen should name the right document and the right signers, and the saved file should appear in your downloads or document list.
- Reopen the saved file and verify it end to end.Close the file, open it again from the copy you intend to send, and check signature placement, filled fields, page count, and total file size.If you used a dedicated service, open the completion record or certificate it supplies and confirm it names the right signers and document.What you see in the reopened file is what the recipient receives, so this check decides whether the job is finished.
Where local markup fits
If one person signs a simple document and no platform is required, local markup can be faster than an online workflow. On macOS, Preview’s Markup toolbar includes a Sign tool: click a saved signature, drag it onto the signature line, resize with the blue handles, then save or export. For a locked copy, choose File > Print and then Save as PDF to flatten the mark into the page. The print dialog is acting as an export route, not sending the file to a printer.
On Windows and Linux, use a trusted PDF reader that offers Fill & Sign or a signature tool. If your reader cannot add a signature, local markup is not the right route; use a dedicated signing service instead. The placement checks are the same on every platform: the mark rests on the line, stays legible, and does not cover text.
Local markup leaves a visual layer, and the finished file’s provenance depends on how you deliver it. If the recipient needs a completion record, or several people must sign, skip the local route and use a managed workflow. For the browser-based route, see our guide to signing a PDF document online.
Three ways to make your mark
The tool lets you create a signature three ways, and the differences that matter sit in what each one adds beyond a visible mark.
| Method | Where it works well | What the reader sees | What it adds beyond a visible mark |
|---|---|---|---|
| Drawn with a finger, stylus, or mouse | Phones, tablets, and trackpad-equipped laptops; saved once and reused | Your handwriting, with natural stroke variation | Nothing on its own. Verification depends on the signing layer that wraps it. |
| Typed name in a script-style font | Desktop signing where speed matters and the recipient accepts a styled name | A stylised version of your name in a handwriting font | Nothing on its own. The font is a visual style; verification depends on the workflow’s digital-signature layer, if present. |
| Uploaded image of a wet-ink signature | Documents that must match a signature already on file; captured on white paper in good light | A near-exact copy of the paper signature | Nothing on its own. A low-resolution capture also prints poorly and scales badly. |
The font question is where marketing runs ahead of the technology. A typed signature in a script face is a visual choice, and it sits in the same category as a drawn mark: an electronic signature under the broad NIST definition. Cryptographic verification depends on whether the platform applies a digital signature and on what the recipient can actually check. Ask what the completion record shows before you assume a file is tamper-evident.
Local markup versus a dedicated e-signature workflow
Both routes finish the document. They differ in what happens around the signing: who gets identified, who gets tracked, and what survives afterward.
| Criterion | Local PDF markup | Dedicated e-signature workflow |
|---|---|---|
| Setup | Open the file in a viewer you already own; no account required | Create an account with the provider the sender or your business uses; invites and access control come with it |
| Form fields | Existing fields fill through the viewer’s form tool; new fields cannot be authored | The sender assigns signature, initials, date, and text fields before sending |
| Multiple signers | Handled by emailing copies and merging, which multiplies version confusion | Signer lists and signing order are managed inside one document, where the provider supports them |
| Signer identification | Whatever you can prove about yourself in the email you send | Depends entirely on the provider and plan; confirm what identity checks, if any, it documents. |
| Integrity and evidence | Visual mark only; a flattened file resists casual edits and nothing more | May include cryptographic validation, PDF certification, timestamps, and a completion record. Ask which of these apply. |
| Devices | Any device with a capable viewer | Browser and mobile apps supplied by the provider |
| What you keep | The finished PDF, plus your own sent mail | The finished PDF plus whatever record, audit log, or certificate the service supplies |
Local markup wins on friction. There is no account, no upload, and no third party holding the file, which makes it the better route for a single signer and a document that stays private. Its weakness is that the finished PDF carries a picture of your signature and little else. If the other side later disputes the file, you have your email trail and your word.
A dedicated workflow earns its extra steps when several people sign or when the sender needs to see progress. These services can combine fill-and-sign, signing requests, agreement tracking, digital-signature validation, certification, and timestamps with form-field tools. Feature sets still vary by provider and plan, so read the current documentation for the service you intend to use.
A worked example makes the split concrete. A freelance designer finishes a one-page invoice acknowledgment on a Tuesday: open the PDF, type the date, drop the saved signature on the line, flatten, reopen, email it back. The same week brings a three-party sublease with initials on every page and a co-signer who must sign after the primary tenant; that one goes through a signing service where fields are assigned and the order is set. Same person, same week, two routes.
If the second scenario describes your work more often than the first, a purpose-built service such as SignWell’s online signature tool is worth evaluating against the checklist below. Judge it on the fields it offers, the record it returns, and how its documentation describes storage and retention.
Signing on a phone or tablet
Mobile signing fails for boring reasons: the page renders at a width that hides fields, a thumb drags the signature into the margin, and the file never gets a second look. Work through these points before you send anything back.
- Open the document in a service you chose, in the browser, or in a file viewer that offers a signing tool; skip scanner and converter apps you cannot identify.
- Zoom in before placing anything. A signature dropped at page width lands in the wrong place once the page renders at full size.
- Complete every field before you send the form back, since partially completed forms invite a second round of email.
- Reopen the finished file on a second device when you can, and check the signature line and every initial box.
Preparing a PDF for other signers
Senders carry most of the avoidable rework. Field placement decides whether the document comes back clean.
- Assign every field before sending: signature, initials, dates, and any text the signer must type.
- Set a signing order where the document needs one. A co-signer box that opens before the primary signer creates hesitation and delays.
- Label each box and add a short instruction where the tool allows it.
- Count the pages after you add fields, and confirm nothing shifted between pages.
- Name the file so a stranger can identify it: counterparty, document type, version.
- Send yourself a test copy and sign it before the real invitation goes out.
- Check the provider’s current interface, because menus, labels, and plan limits change between releases.
Security and privacy checks before you upload
Warning
Uploading a private PDF to an unfamiliar converter site hands the document to an operator you have not vetted. Ad-supported “sign PDF free” sites and unknown scanner apps can expose the document, and the invoice or lease you upload may contain account numbers and identity details.
Check the transport first. The upload page and the signing link should both run over HTTPS, and a send link should be tied to a specific document. Then read the provider’s security documentation for where files are stored, how long they are retained, and how deletion works. Marketing copy will not answer those questions for you.
Protect the account, not just the file. Turn on multi-factor authentication, keep your software current, and back up the records you rely on. When an unexpected e-signature request arrives, verify it through a website or phone number you already know instead of the contact details inside the message; the FTC’s phishing guidance covers the reporting steps if you have already clicked.
Understand which layer you are relying on. A properly implemented digital signature can support tamper detection through hashing and key-based verification. A pasted signature image cannot, which matters if the file may later be challenged or reused without your knowledge.
Archive deliberately. Keep the final PDF together with the completion record, audit log, or certificate the service supplied, and confirm the service supplies one before you depend on it.
Which route fits your document
A one-off personal form. Use local markup if your PDF app offers a signing tool. A permission slip, a rental application acknowledgment, or a benefits form with one signature line does not need an account, and keeping the file on your own device avoids an unnecessary upload.
Freelance client work. Match the client’s process. If they email a PDF and ask for a signed copy back, use your viewer and flatten the export. If they send a platform link, sign inside their platform so their record stays complete.
Remote teams and small businesses. Use a dedicated workflow when two or more people sign, when the document needs initials on multiple pages, or when someone needs to see who has completed what. The structured record is the product here.
Phone-first signers. A reputable browser-based service keeps the whole job in one tab and avoids app installs. Confirm the placement before you send, and prefer a provider you can name over the first free result in a search list.
EU qualified-signature requirements. If a recipient or a local rule specifically requires a qualified electronic signature, you need a qualified trust service provider operating under eIDAS. Ask the recipient what they will accept before you buy anything, and treat general-purpose signing tools as a different category.
Finish the file, then verify it
The step people skip is the last one. Reopen the finished PDF, page through it, and confirm the signature sits on the line, the dates are correct, and the page count matches the original you started with. If a completion record came with the file, keep it beside the PDF in the same folder so the pair travels together.
Then confirm what the recipient expects before you rely on the signature. Local requirements, internal approval rules, and platform policies vary by country and by organization, and no signing tool can settle that question for you.
Choose the viewer for a quick single signature, choose a managed workflow when other people and future disputes are involved, and verify the saved file either way. The printer can stay off.
