You can free up storage on a Mac without installing a cleaner app. Start with System Settings > General > Storage, identify the categories actually using space, and remove or move files you recognize before touching system-managed data.
On macOS Ventura 13 or later, choose Apple menu > System Settings > General > Storage. Earlier macOS versions show storage through Apple menu > About This Mac > Storage. The Storage view shows usage by category and updates as space is reclaimed.
Free Up Storage on Your Mac Step by Step
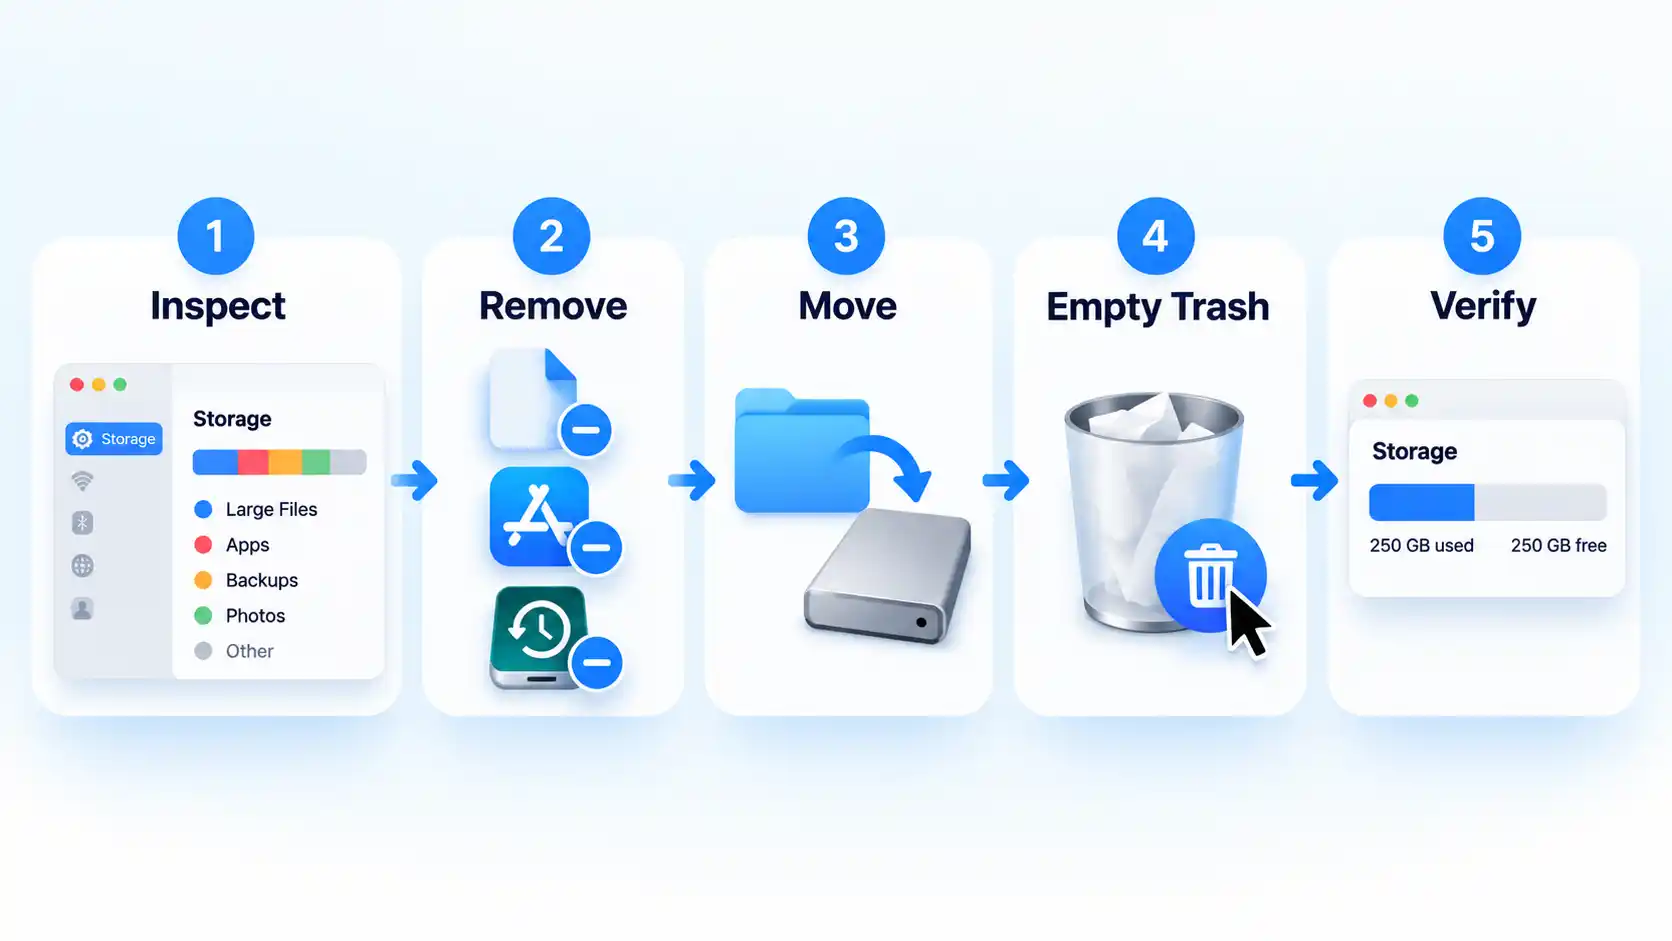
The safest order is to inspect first, remove recognized data second, and verify the result before deleting anything else. You do not need to perform every step if one category already explains most of your storage use.
- Open Storage settings. Choose Apple menu > System Settings > General > Storage. Give macOS time to calculate the categories, then note both the available space and the categories using the most storage. If a category has a More Info button, use it to inspect the files or options associated with that category.
- Start with large files you recognize. If Documents, Downloads, media, or another user-controlled category is large, review files that are safe to judge individually: downloaded installers, old archives, exported videos, duplicate project copies, disk images, and other files you know you no longer need. Avoid deleting an unfamiliar file merely because it is large.
- Remove apps you no longer use. Open the Applications folder in Finder. If an app has its own uninstaller, use that first. If it does not, many apps installed from the internet or a disc can be dragged from Applications to the Trash. Apps with supplied uninstallers should be removed through those uninstallers. Apps required by macOS cannot normally be removed this way.
- Review old local iPhone or iPad backups. Connect the device to the Mac with a cable, select it in Finder, and trust the device if prompted. Open the General tab and click Manage Backups. Review the dates before deleting anything. The Manage Backups menu lets you delete, archive, or reveal individual backups, so remove only backups you have identified as obsolete.
- Deal with Photos and other large media carefully. If Photos, videos, music, or project media dominate your storage, decide whether the files are expendable or simply too large to keep on the Mac. Valuable media is often better moved to supported external storage or optimized through iCloud rather than deleted.
- Clean app-specific content where the controls are clear. Media you can download again is an obvious candidate. If Mail is using substantial space, choose Mailbox > Erase Junk Mail and, when appropriate, Mailbox > Erase Deleted Items. Prefer controls inside the relevant app instead of manually removing unfamiliar files from hidden Library folders.
- Empty the Trash after reviewing it. Moving a file to the Trash does not return that storage to the available pool. Check the Trash first, then empty it only when you are comfortable permanently removing those items.
- Recheck available storage and stop when you have enough. Return to System Settings > General > Storage. Let the figures update and confirm that available capacity increased. If you now have enough room for the update, download, project, or other task that triggered the cleanup, there is no need to keep deleting files simply to make the storage graph smaller.
Verify the result
- The available-storage figure in System Settings has increased after macOS finishes recalculating it.
- The category you targeted is smaller, or the files and apps you intended to remove are no longer present.
- You have enough free space for the task that prompted the cleanup, so further deletion is unnecessary.
Why You Usually Don’t Need a Cleaner App
macOS already covers the main jobs required for ordinary storage cleanup: it shows where space is going, exposes management options for several categories, lets you uninstall apps, supports moving files to external storage, and provides iCloud-based optimization. When storage is tight, macOS can also clear caches and logs that are safe to recreate.
A cleaner app can still make file discovery or maintenance more convenient by putting several functions into one interface. For example, a cleaner app can add convenience for reviewing large and old files. That convenience is different from necessity: you can perform the core storage-recovery workflow with macOS itself.
Manual cleanup also keeps the final decision with you. Software may identify a deletion candidate, but only you can determine whether a large video export is expendable, an older device backup is still valuable, or a photo library contains the only copy of important images. A category-first process keeps those judgments separate from file discovery.
What to Leave Alone: System Data, Caches, and Snapshots
macOS groups storage that does not belong to a more specific category under System Data. That label can therefore include material associated with both Apple and third-party software; it is not the name of one folder waiting to be emptied.
A cache is stored data that software can reuse instead of fetching or rebuilding it each time. When the Mac needs room, macOS already removes some caches, logs, interrupted downloads, staged updates, and other data that it considers safe to recreate. Clearing such files manually can produce only temporary savings because applications or macOS may build them again.
Time Machine local snapshots are recovery copies stored on the Mac’s startup disk. On disks using Apple File System (APFS), Time Machine can keep these snapshots locally so previous versions of files remain recoverable when the backup disk is unavailable. Their space is counted as available and snapshots are deleted automatically as space is needed, so manual removal is not a sensible first step in routine cleanup.
Do not indiscriminately delete files from /System, /Library, ~/Library, cache folders, or snapshot structures just because the Storage graph is large. Remove recognizable personal files and application data first, then investigate System Data only if the ordinary categories still do not explain the shortage.
If Storage Still Looks Full
If you have removed obvious files but available storage is still lower than expected, narrow the problem before deleting anything more.
Deleted files have not increased available storage
Check the Trash first. Files moved there still occupy storage until the Trash is emptied. After emptying it, reopen System Settings > General > Storage and allow the categories to recalculate.
Backups still appear to be using a lot of space
Review local iPhone or iPad backups through Finder rather than deleting backup folders blindly. Connect the device, select it in Finder, trust it if prompted, open General, then choose Manage Backups. Delete only backups you have positively identified as obsolete.
System Data is still the largest category
Do not treat that number as proof that system folders should be purged. First check whether large applications, device backups, other user accounts, Photos libraries, local media, or application-specific data still account for the shortage. System Data can combine multiple kinds of files, including data macOS manages automatically.
You only need enough room to complete an update or installation
Safe Mode can temporarily make more storage available by clearing certain system caches. Those caches are recreated as needed, so this is a short-term measure rather than routine maintenance. Apple presents Safe Mode as a temporary way to make room for tasks such as a macOS update. Restart normally when the task is complete.
If the same user-controlled category remains large after these checks, return to that category rather than switching randomly between cleanup tricks. The goal is to identify the data responsible for the shortage, not to make every storage category as small as possible.
When Moving Files Is Better Than Deleting Them
Deletion is the wrong answer when a file is valuable but does not need to remain on the Mac’s internal storage. Photos, raw video, completed project archives, virtual machines, sample libraries, and other large data can often be moved to an appropriate external drive instead.
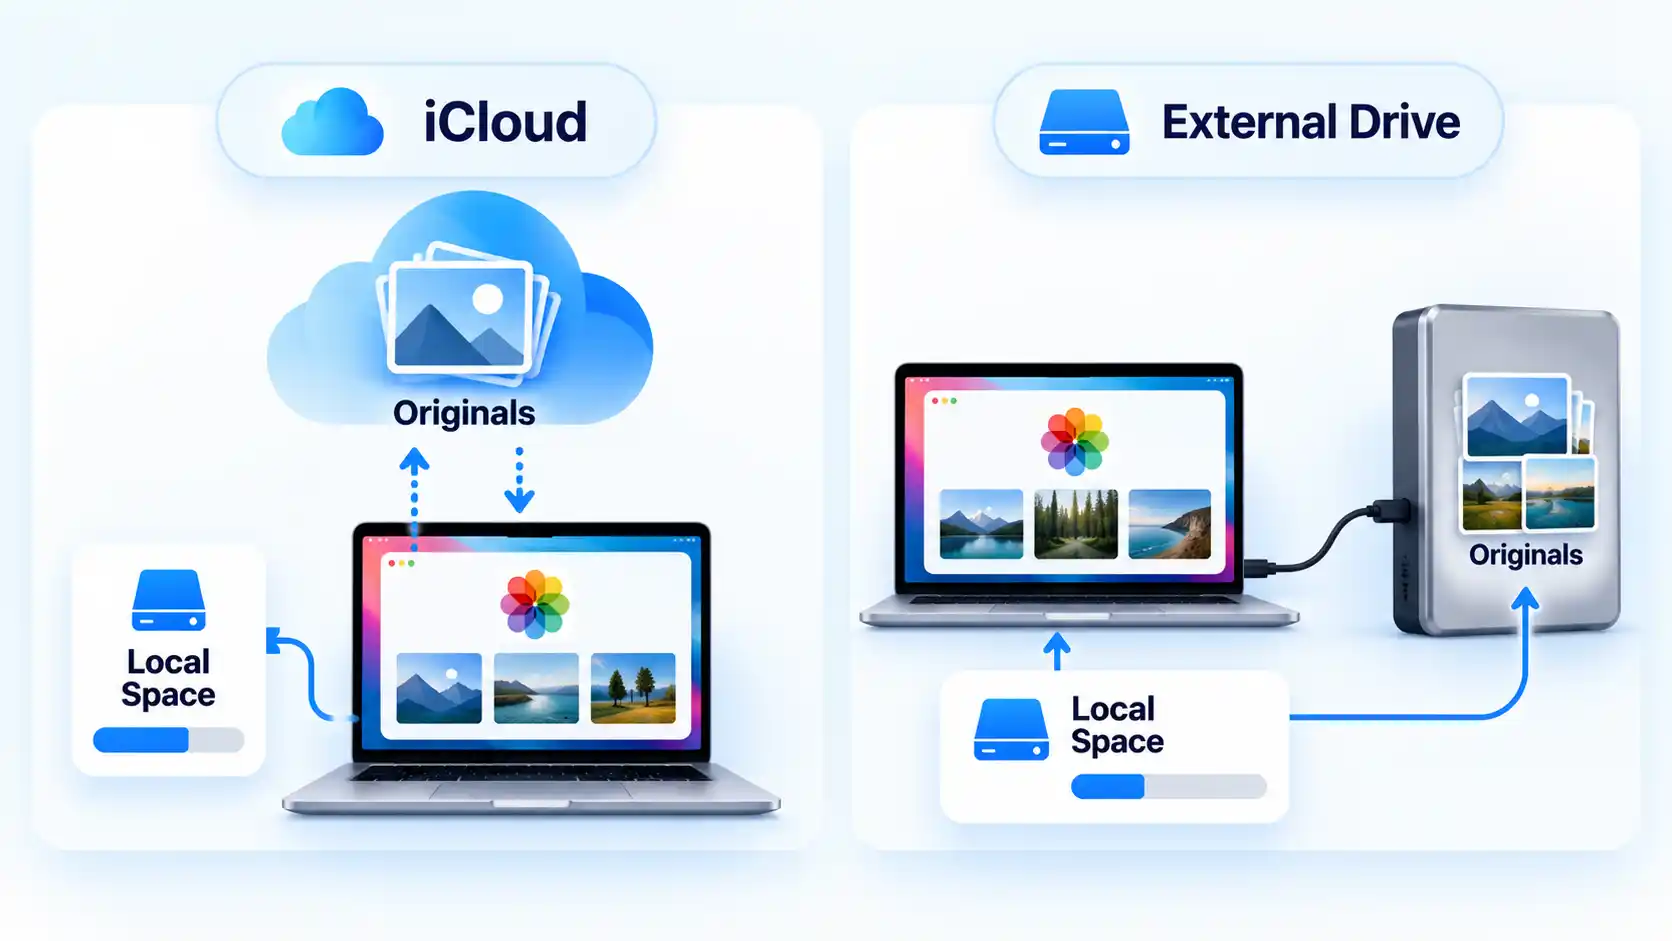
A Photos library needs extra care because its new location has specific requirements. The external device should be formatted as APFS or Mac OS Extended (Journaled). It should not be the disk used for Time Machine backups, an SD card, a USB flash drive, a network share, or internet-based storage. These storage requirements apply when moving a Photos library.
Quit Photos, move the library to the supported external device, then double-click the library in its new location to open it. If you use iCloud Photos or need the library through the Photo Picker in other apps, designate the moved library as the System Photo Library, meaning the library macOS treats as the primary Photos library for those integrations. Only after the moved library opens correctly should you remove the original from the Mac. Keep the external device connected and available when you open Photos; if Photos cannot find the library there, it can create a new empty library in the default Pictures folder.
iCloud Photos offers a different trade-off. With Optimise Mac Storage enabled, Photos can use smaller local versions when storage is limited while iCloud retains the full-size originals. This requires iCloud Photos and enough iCloud capacity for the library. It is synchronization and storage optimization, not an independent offline backup.
The same principle applies beyond Photos: delete data that is genuinely expendable, but move or optimize data that still has value. Once the Mac has enough free storage for normal work, an update, or the task that prompted the cleanup, stop there rather than chasing a smaller storage graph.

💬 Comments